During the last week (as I've been getting excited to bring my first conure home) I've also been checking out some "conure sized" toys and perches that are on some vendors' wesbites, trying to get ideas of what I could spoil my new birdie with. But my entire life I've been more of a self-sustaining person, and to add onto that I'm horribly impatent and weirdly crafty. I saw some different takes on the idea of "platform perches" on a couple of websites (including Amazon), and I really really REALLY hate paying shipping/handling. So I woke up today and decided that I was going to make some of my own (for half the cost and none of the wait time). I got my supplies from Michael's (a specialty craft store chain in the US) and Lowe's (my favorite hardware store because it's so organized and there's an ENTIRE ISLE OF LIGHT FIXTURES ON DISPLAY). This whole project took roughly 4 hours and cost ~$30 (for 4 platform perches of varying sizes). (Balsa wood is definitely more expensive than I thought, or I'm just shopping in the wrong place? I have no idea, this is my first time doing anything like this for my birds.)
I thought platform perches in my cages could change things up a bit and exercise the birdies' feet, but these also come in handy for disabled birds who can't perch properly or have lost toes/feet.
I took pictures of each step so it's easy to follow, because I wanted to help out some other people who might not want to wait on a shipment or pay shipping and handling either! (Though the ones on some of the other vendor's sites are WAY cuter than these.)
Materials:
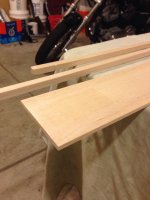
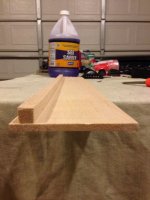
-- Balsa Wood (the "rod" is 1/4" by 3 or 4 feet, and the platform is the thickest one they had (0.25") x 3" wide x 4 feet? -- I'm sorry for not having the exact measurements, I took the stickers off to do this and crumpled them up then lost them.)
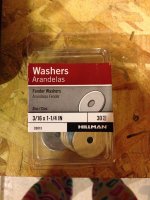
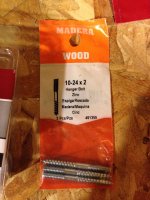
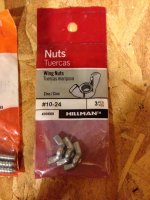
-- The Hardware (all of the information on sizes and pieces I used are on the labels, but in case you can't see the images for some reason (in order of appearance) they are:
(1) fender washers (zinc) (3/16 x 1 1/4" or the size of the hole by the size of the rest of the washer)
(2) hanger bolts (zinc) (10-24 x 2) (4 packages or 12 pieces)
(3) wing nuts (zinc) (#10-24) (4 packages or 12 pieces)
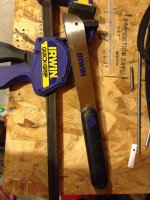
-- A grip/clamp, a hacksaw, and screw gun (power screw driver, but that's not pictured) (Truth be told these were just in my garage and my dad had to teach me how to use the clamp because for everything else I've done "construction wise" I've used the table saw.)
-- A hot glue gun and extra hot glue sticks ((I did research and I found that hot glue fumes are bad for birds so please do not do these steps around your birds! I used hot glue sparingly, and made sure that there were no exposed patches of dried hot glue that the birds could chew on, and if there were "by accident" I covered them up or cut them off! If you're making these perches, I strongly encourage you to replace the platforms as soon as you notice them chewing them down to the point where they might reach the hot glue!))
(Optional) Popsicle Sticks (I just used these to make them "cuter" but if you're going for a more utility type feel than "cuteness" level then you don't need these. I think the popsicle-stick step took the longest, by the way.)
DIRECTIONS:
Pre-Step One:
Take some kind of a straight-edge and mark how big you want your platform(s) to be. (Make sure the markings go all of the way across the width of the board and that they're straight. Unless you want round perches - which I have no objection to.)
Step One:
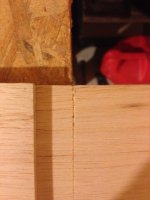
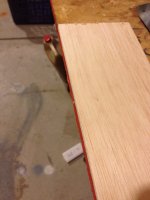
Lay your "platform" wood's length and end flush against the edge of your work space. (When I say "end" here I just mean to the marking you made on your board to signify the end of the perch area.)
Step Two:
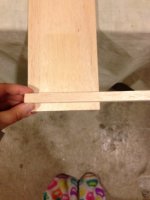
Lay your balsa wood plank down on a flat surface, and lay the "rod" across it (width-wise). Mark the edge on the rod with either a pencil or (what I used) a chisel pressed into the wood. This is so you don't overestimate the width of the platform itself and make your (let's call them "legs") too long to fit nicely underneath the platform. Unless you want them longer, because you can totally make them longer if you want to. (You can mark up the length of the "rod" as many times as you want. Just go from the edge of your first marking to the other side, mark it, and repeat.) ((Don't worry I get to cutting the actual platform off of the platform plank in a couple of steps.))
Step Three:
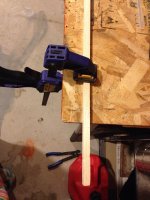
Lay your marked, balsa wood "rod" down flat on your work space. Make sure that its length is parallel to the length of the table. Then clamp it down to the table nice and tight. (I learned the hard way that if you clamp it down too tight, the balsa wood will get weird indentations because it's so soft. So if you care what the "legs" of your platform perch look like, don't clamp too tight.)
Step Four:
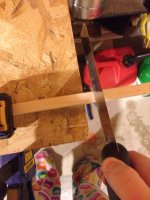
Cut the balsa wood "rod" along the markings you made.
Step Five:
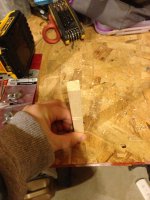
After you're finished cutting the "legs" of your platform perch, lay most of them aside and grab one. Stand it flat and upright on your work space. (On this step it's best if you hold it near the middle.)
Step Six:
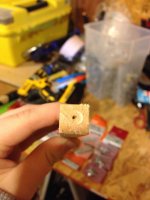
Using your power screwdriver or electric screw driver or screw gun, pre-drill a hole into the center of your balsa wood "leg." (Make sure that the drill goes straight into the "leg" and NOT at an angle. It's turns out the best if you drill down into the "leg" while holding it upright and flat on the work space.)
Step Seven:
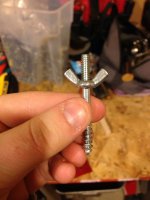
Take one of the "hanger bolts" and one of the "wing nuts" and screw the wing nut down to the smooth middle on the side with no screw-end or the side with the smaller threading. (Screw it all the way down until the wing nut stops turning, but don't make it too tight.)
Step Eight:
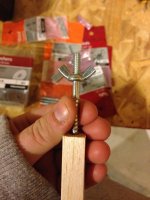
Place the screw-end into the pre-drilled hole on the "leg." (Again, make sure everything is lined up perfectly square so you don't have a squampusly mounted platform perch at the end of this.)
Step Nine:
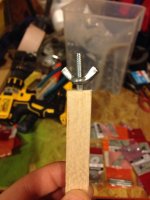
Using your hand, push / screw the hanger bolt into the pre-drilled hole. Screw it down until only a minimal part of the smooth center of the hanger bolt can be seen. (Please make sure everything is square. On one of mine I was rushing it (because I'm an impatient little nerd) and I broke the "rod" piece I was using and had to start a new one.)
Step Ten:
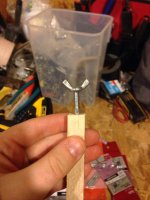
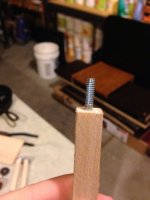
WITHOUT REMOVING THE HANGER BOLT FROM THE "LEG" gently unscrew the wing nut from the hanger bolt, until it comes off. (This part is super easy. Just be sure not to pull on the hanger bolt at all, or it'll screw everything up.)
Step Eleven:
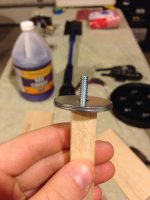
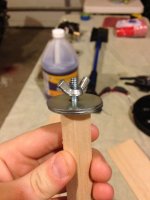
Place two washers onto the end of the hanger bolt, then replace the wing nut until it's tight.
IMPORTANT
The number of "legs" you make depends on how long your platforms are and how many you're making! (I ended up making 11 "legs." )
I forgot to take pictures of these steps, but they're super simple.
I did research and I found that hot glue fumes are bad for birds so please do not do these steps around your birds! I used hot glue sparingly, and made sure that there were no exposed patches of dried hot glue that the birds could chew on, and if there were "by accident" I covered them up or cut them off! If you're making these perches, I strongly encourage you to replace the platforms as soon as you notice them chewing them down to the point where they might reach the hot glue!
Step Twelve:
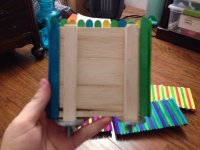
Using a bit of hot glue, glue the "legs" of your perch to your platform. (I made mine with the legs flush against the edges of both sides.)
(Optional) Step Thirteen:
Be sure you're only using enough to get the wood pieces to stick together tightly, glue some popsicle sticks in rows or columns along the tops and edges of your new platform perch!
THE FINISHED PRODUCT:
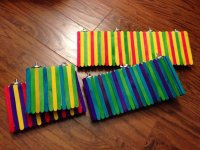
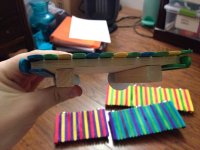
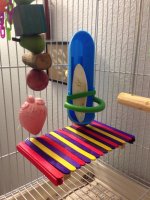
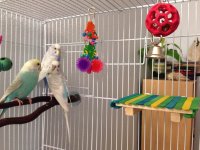
Here's what my new platform perches look like my budgies' cage!
I hope I helped give someone an idea of how to spice up their bird's cage or help a disabled bird out! Thank you guys for reading!
I thought platform perches in my cages could change things up a bit and exercise the birdies' feet, but these also come in handy for disabled birds who can't perch properly or have lost toes/feet.
I took pictures of each step so it's easy to follow, because I wanted to help out some other people who might not want to wait on a shipment or pay shipping and handling either! (Though the ones on some of the other vendor's sites are WAY cuter than these.)
Materials:


-- Balsa Wood (the "rod" is 1/4" by 3 or 4 feet, and the platform is the thickest one they had (0.25") x 3" wide x 4 feet? -- I'm sorry for not having the exact measurements, I took the stickers off to do this and crumpled them up then lost them.)


-- The Hardware (all of the information on sizes and pieces I used are on the labels, but in case you can't see the images for some reason (in order of appearance) they are:
(1) fender washers (zinc) (3/16 x 1 1/4" or the size of the hole by the size of the rest of the washer)
(2) hanger bolts (zinc) (10-24 x 2) (4 packages or 12 pieces)
(3) wing nuts (zinc) (#10-24) (4 packages or 12 pieces)

-- A grip/clamp, a hacksaw, and screw gun (power screw driver, but that's not pictured) (Truth be told these were just in my garage and my dad had to teach me how to use the clamp because for everything else I've done "construction wise" I've used the table saw.)
-- A hot glue gun and extra hot glue sticks ((I did research and I found that hot glue fumes are bad for birds so please do not do these steps around your birds! I used hot glue sparingly, and made sure that there were no exposed patches of dried hot glue that the birds could chew on, and if there were "by accident" I covered them up or cut them off! If you're making these perches, I strongly encourage you to replace the platforms as soon as you notice them chewing them down to the point where they might reach the hot glue!))
(Optional) Popsicle Sticks (I just used these to make them "cuter" but if you're going for a more utility type feel than "cuteness" level then you don't need these. I think the popsicle-stick step took the longest, by the way.)
DIRECTIONS:
Pre-Step One:
Take some kind of a straight-edge and mark how big you want your platform(s) to be. (Make sure the markings go all of the way across the width of the board and that they're straight. Unless you want round perches - which I have no objection to.)
Step One:


Lay your "platform" wood's length and end flush against the edge of your work space. (When I say "end" here I just mean to the marking you made on your board to signify the end of the perch area.)
Step Two:

Lay your balsa wood plank down on a flat surface, and lay the "rod" across it (width-wise). Mark the edge on the rod with either a pencil or (what I used) a chisel pressed into the wood. This is so you don't overestimate the width of the platform itself and make your (let's call them "legs") too long to fit nicely underneath the platform. Unless you want them longer, because you can totally make them longer if you want to. (You can mark up the length of the "rod" as many times as you want. Just go from the edge of your first marking to the other side, mark it, and repeat.) ((Don't worry I get to cutting the actual platform off of the platform plank in a couple of steps.))
Step Three:

Lay your marked, balsa wood "rod" down flat on your work space. Make sure that its length is parallel to the length of the table. Then clamp it down to the table nice and tight. (I learned the hard way that if you clamp it down too tight, the balsa wood will get weird indentations because it's so soft. So if you care what the "legs" of your platform perch look like, don't clamp too tight.)
Step Four:

Cut the balsa wood "rod" along the markings you made.
Step Five:

After you're finished cutting the "legs" of your platform perch, lay most of them aside and grab one. Stand it flat and upright on your work space. (On this step it's best if you hold it near the middle.)
Step Six:

Using your power screwdriver or electric screw driver or screw gun, pre-drill a hole into the center of your balsa wood "leg." (Make sure that the drill goes straight into the "leg" and NOT at an angle. It's turns out the best if you drill down into the "leg" while holding it upright and flat on the work space.)
Step Seven:

Take one of the "hanger bolts" and one of the "wing nuts" and screw the wing nut down to the smooth middle on the side with no screw-end or the side with the smaller threading. (Screw it all the way down until the wing nut stops turning, but don't make it too tight.)
Step Eight:

Place the screw-end into the pre-drilled hole on the "leg." (Again, make sure everything is lined up perfectly square so you don't have a squampusly mounted platform perch at the end of this.)
Step Nine:

Using your hand, push / screw the hanger bolt into the pre-drilled hole. Screw it down until only a minimal part of the smooth center of the hanger bolt can be seen. (Please make sure everything is square. On one of mine I was rushing it (because I'm an impatient little nerd) and I broke the "rod" piece I was using and had to start a new one.)
Step Ten:


WITHOUT REMOVING THE HANGER BOLT FROM THE "LEG" gently unscrew the wing nut from the hanger bolt, until it comes off. (This part is super easy. Just be sure not to pull on the hanger bolt at all, or it'll screw everything up.)
Step Eleven:


Place two washers onto the end of the hanger bolt, then replace the wing nut until it's tight.
IMPORTANT
The number of "legs" you make depends on how long your platforms are and how many you're making! (I ended up making 11 "legs." )
I forgot to take pictures of these steps, but they're super simple.
I did research and I found that hot glue fumes are bad for birds so please do not do these steps around your birds! I used hot glue sparingly, and made sure that there were no exposed patches of dried hot glue that the birds could chew on, and if there were "by accident" I covered them up or cut them off! If you're making these perches, I strongly encourage you to replace the platforms as soon as you notice them chewing them down to the point where they might reach the hot glue!
Step Twelve:

Using a bit of hot glue, glue the "legs" of your perch to your platform. (I made mine with the legs flush against the edges of both sides.)
(Optional) Step Thirteen:
Be sure you're only using enough to get the wood pieces to stick together tightly, glue some popsicle sticks in rows or columns along the tops and edges of your new platform perch!
THE FINISHED PRODUCT:


Here's what my new platform perches look like my budgies' cage!
I hope I helped give someone an idea of how to spice up their bird's cage or help a disabled bird out! Thank you guys for reading!


